Advanced setup
To have working internet radio and to let the analytics data be sent to your Überböse-API server instead of to events.api.bosecm.com, you have to perform the advanced setup described in this guide.
As described here
and here
you can get a root shell into your speaker when you plug in a USB stick with an empty file called remote_services.
For some people a normal, off-the-shelf, USB stick (probably formatted with FAT32) worked. But my ST-10 did not accept that. I needed an EXT2 formatted USB stick with a master boot record.
I suggest that you first simply try out the USB stick as it is.
If that does not work, you can follow this step-by-step guide to preparing a EXT2 USB stick:
Guide: Creating an EXT2 “Unlock” USB Stick
OS: Linux Command Line
⚠️ Warning
This process deletes all data on the USB stick.
Identify your USB drive letter carefully (e.g., sdb, sdc).
In this guide, we use sdX. Replace X with your actual letter.
Step 1: Identify and Unmount
Plug in the USB stick into your Linux PC and find its name.
lsblk
# Look for your stick (e.g., /dev/sdc). We will use 'sdX' below.
Unmount it to ensure no files are busy.
sudo umount /dev/sdX*
Step 2: Create MBR Partition Table
- Open the partition tool: ```bash sudo fdisk /dev/sdX
2. Type the following letters in order (press **Enter** after each):
* `o` (Create new DOS partition table)
* `n` (New partition)
* `p` (Primary)
* `1` (Partition number 1)
* *(Press Enter)* (Default first sector)
* *(Press Enter)* (Default last sector)
* `w` (Write changes and exit)

### Step 3: Format to Legacy EXT2

Format the new partition (`sdX1`) with 128-byte inodes.

```bash
sudo mkfs.ext2 -I 128 -b 4096 /dev/sdX1
Step 4: Add the Trigger File
Mount the drive and create the “key” file that activates the services.
- Create a mount point (if not exists): ```bash sudo mkdir -p /mnt/usb
2. Mount the partition:
```bash
sudo mount /dev/sdX1 /mnt/usb
- Create the magic file: ```bash sudo touch /mnt/usb/remote_services
4. Unmount the drive to save the data.

```bash
sudo umount /mnt/usb
Done. You have prepared the USB Stick.
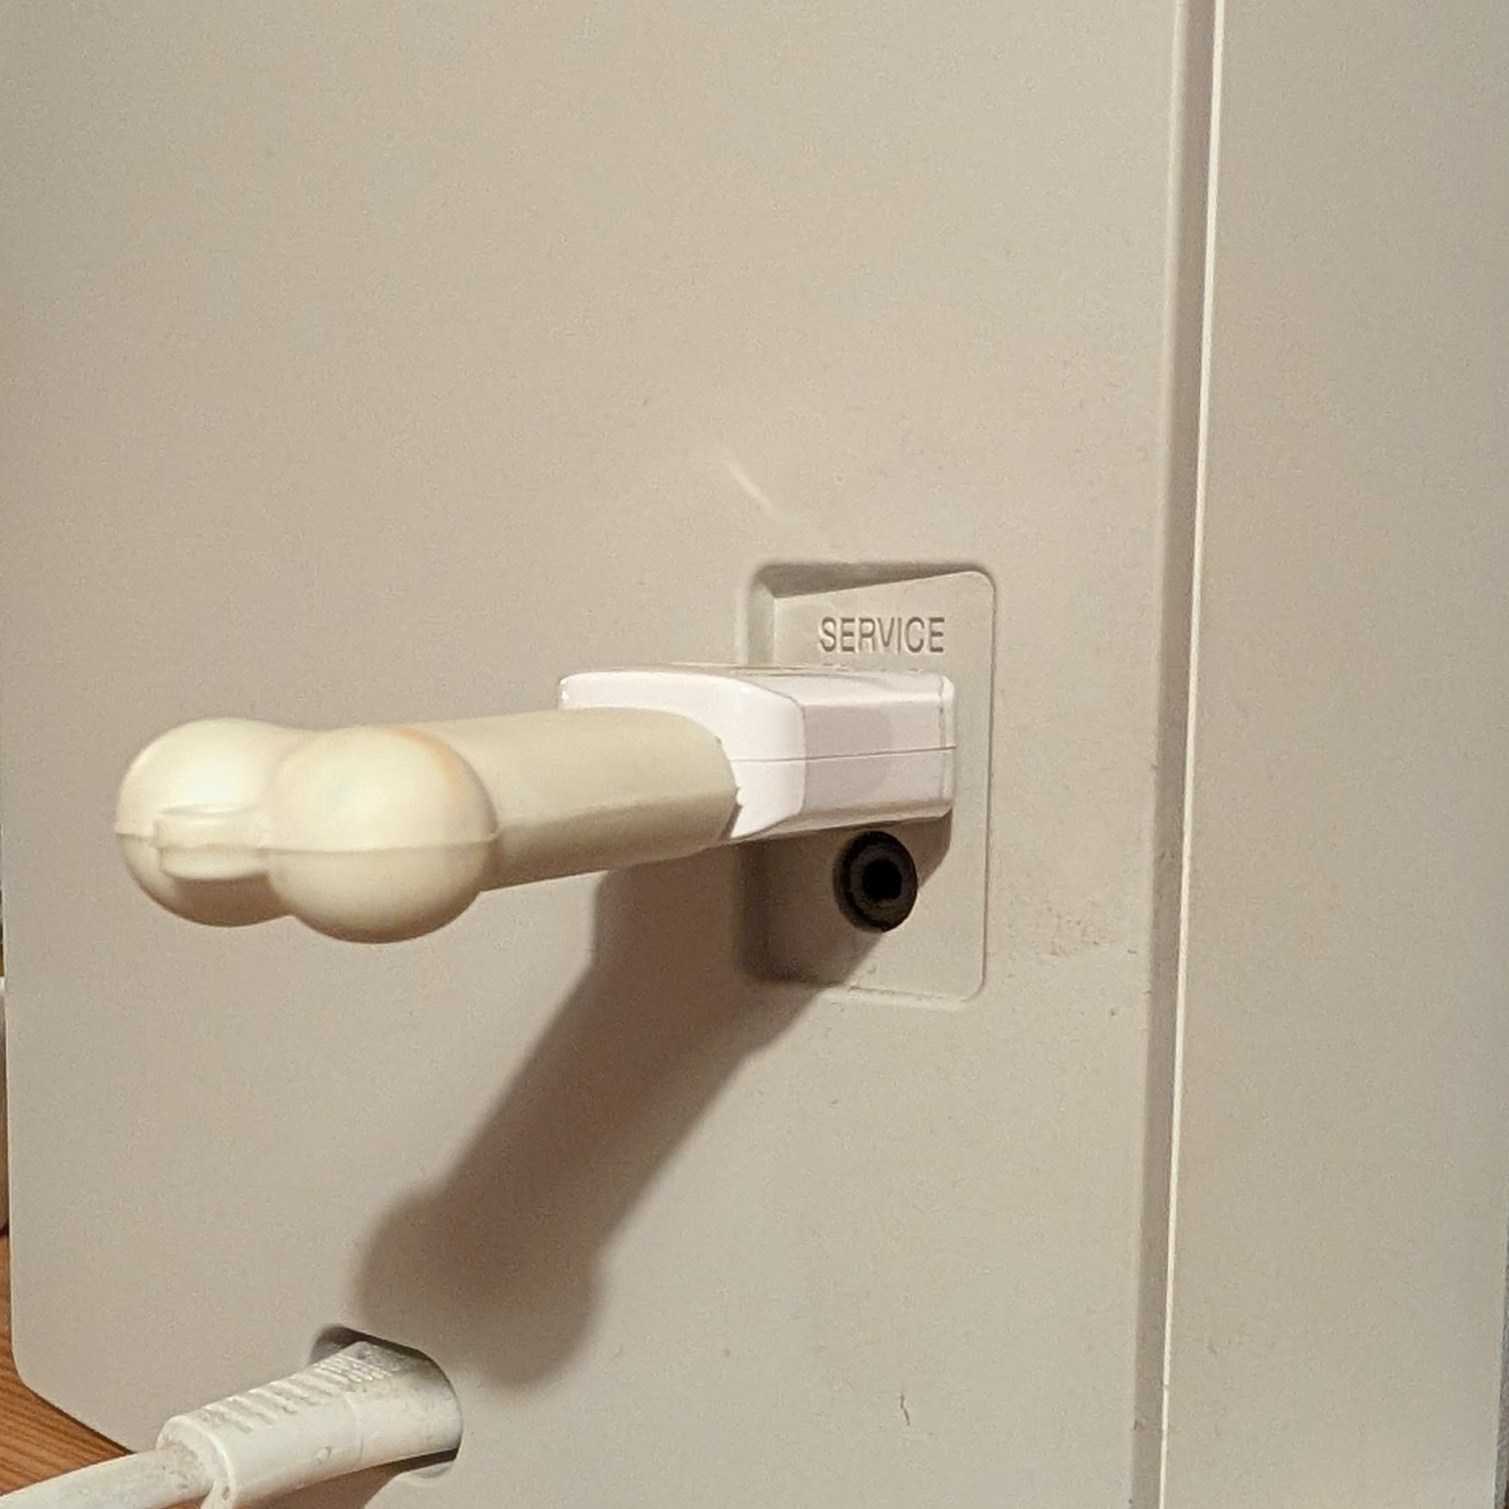
Plug in the USB stick
Now it is time to plug in the stick.
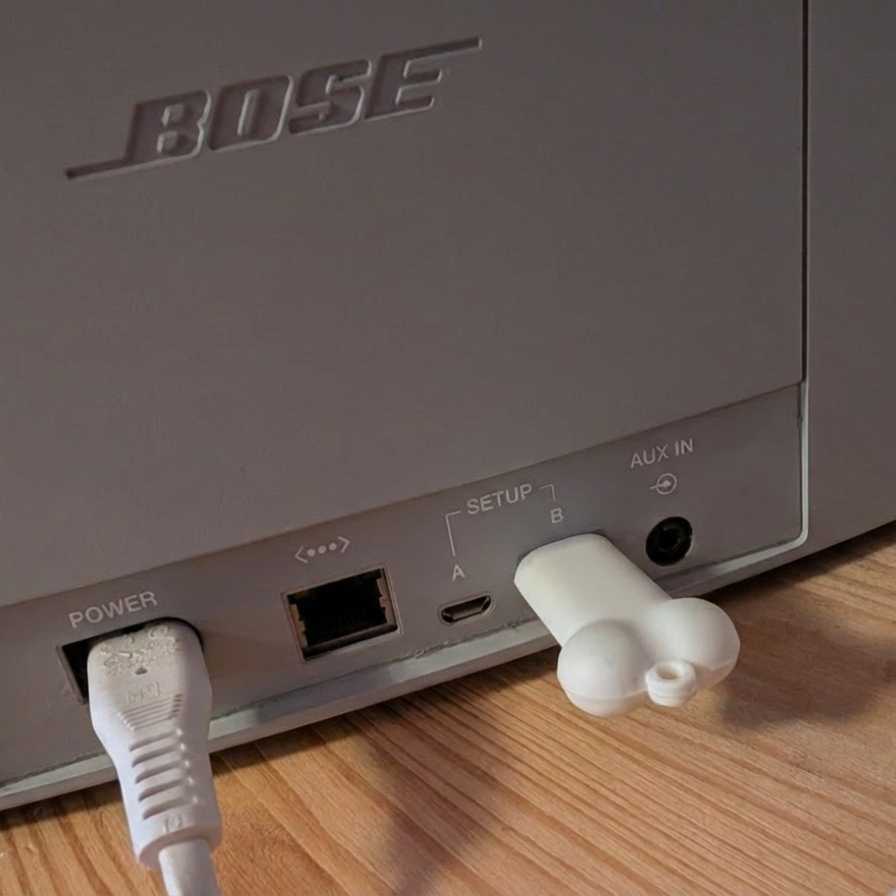
With the SoundTouch 20 it is very easy. Just use the USB-A port.
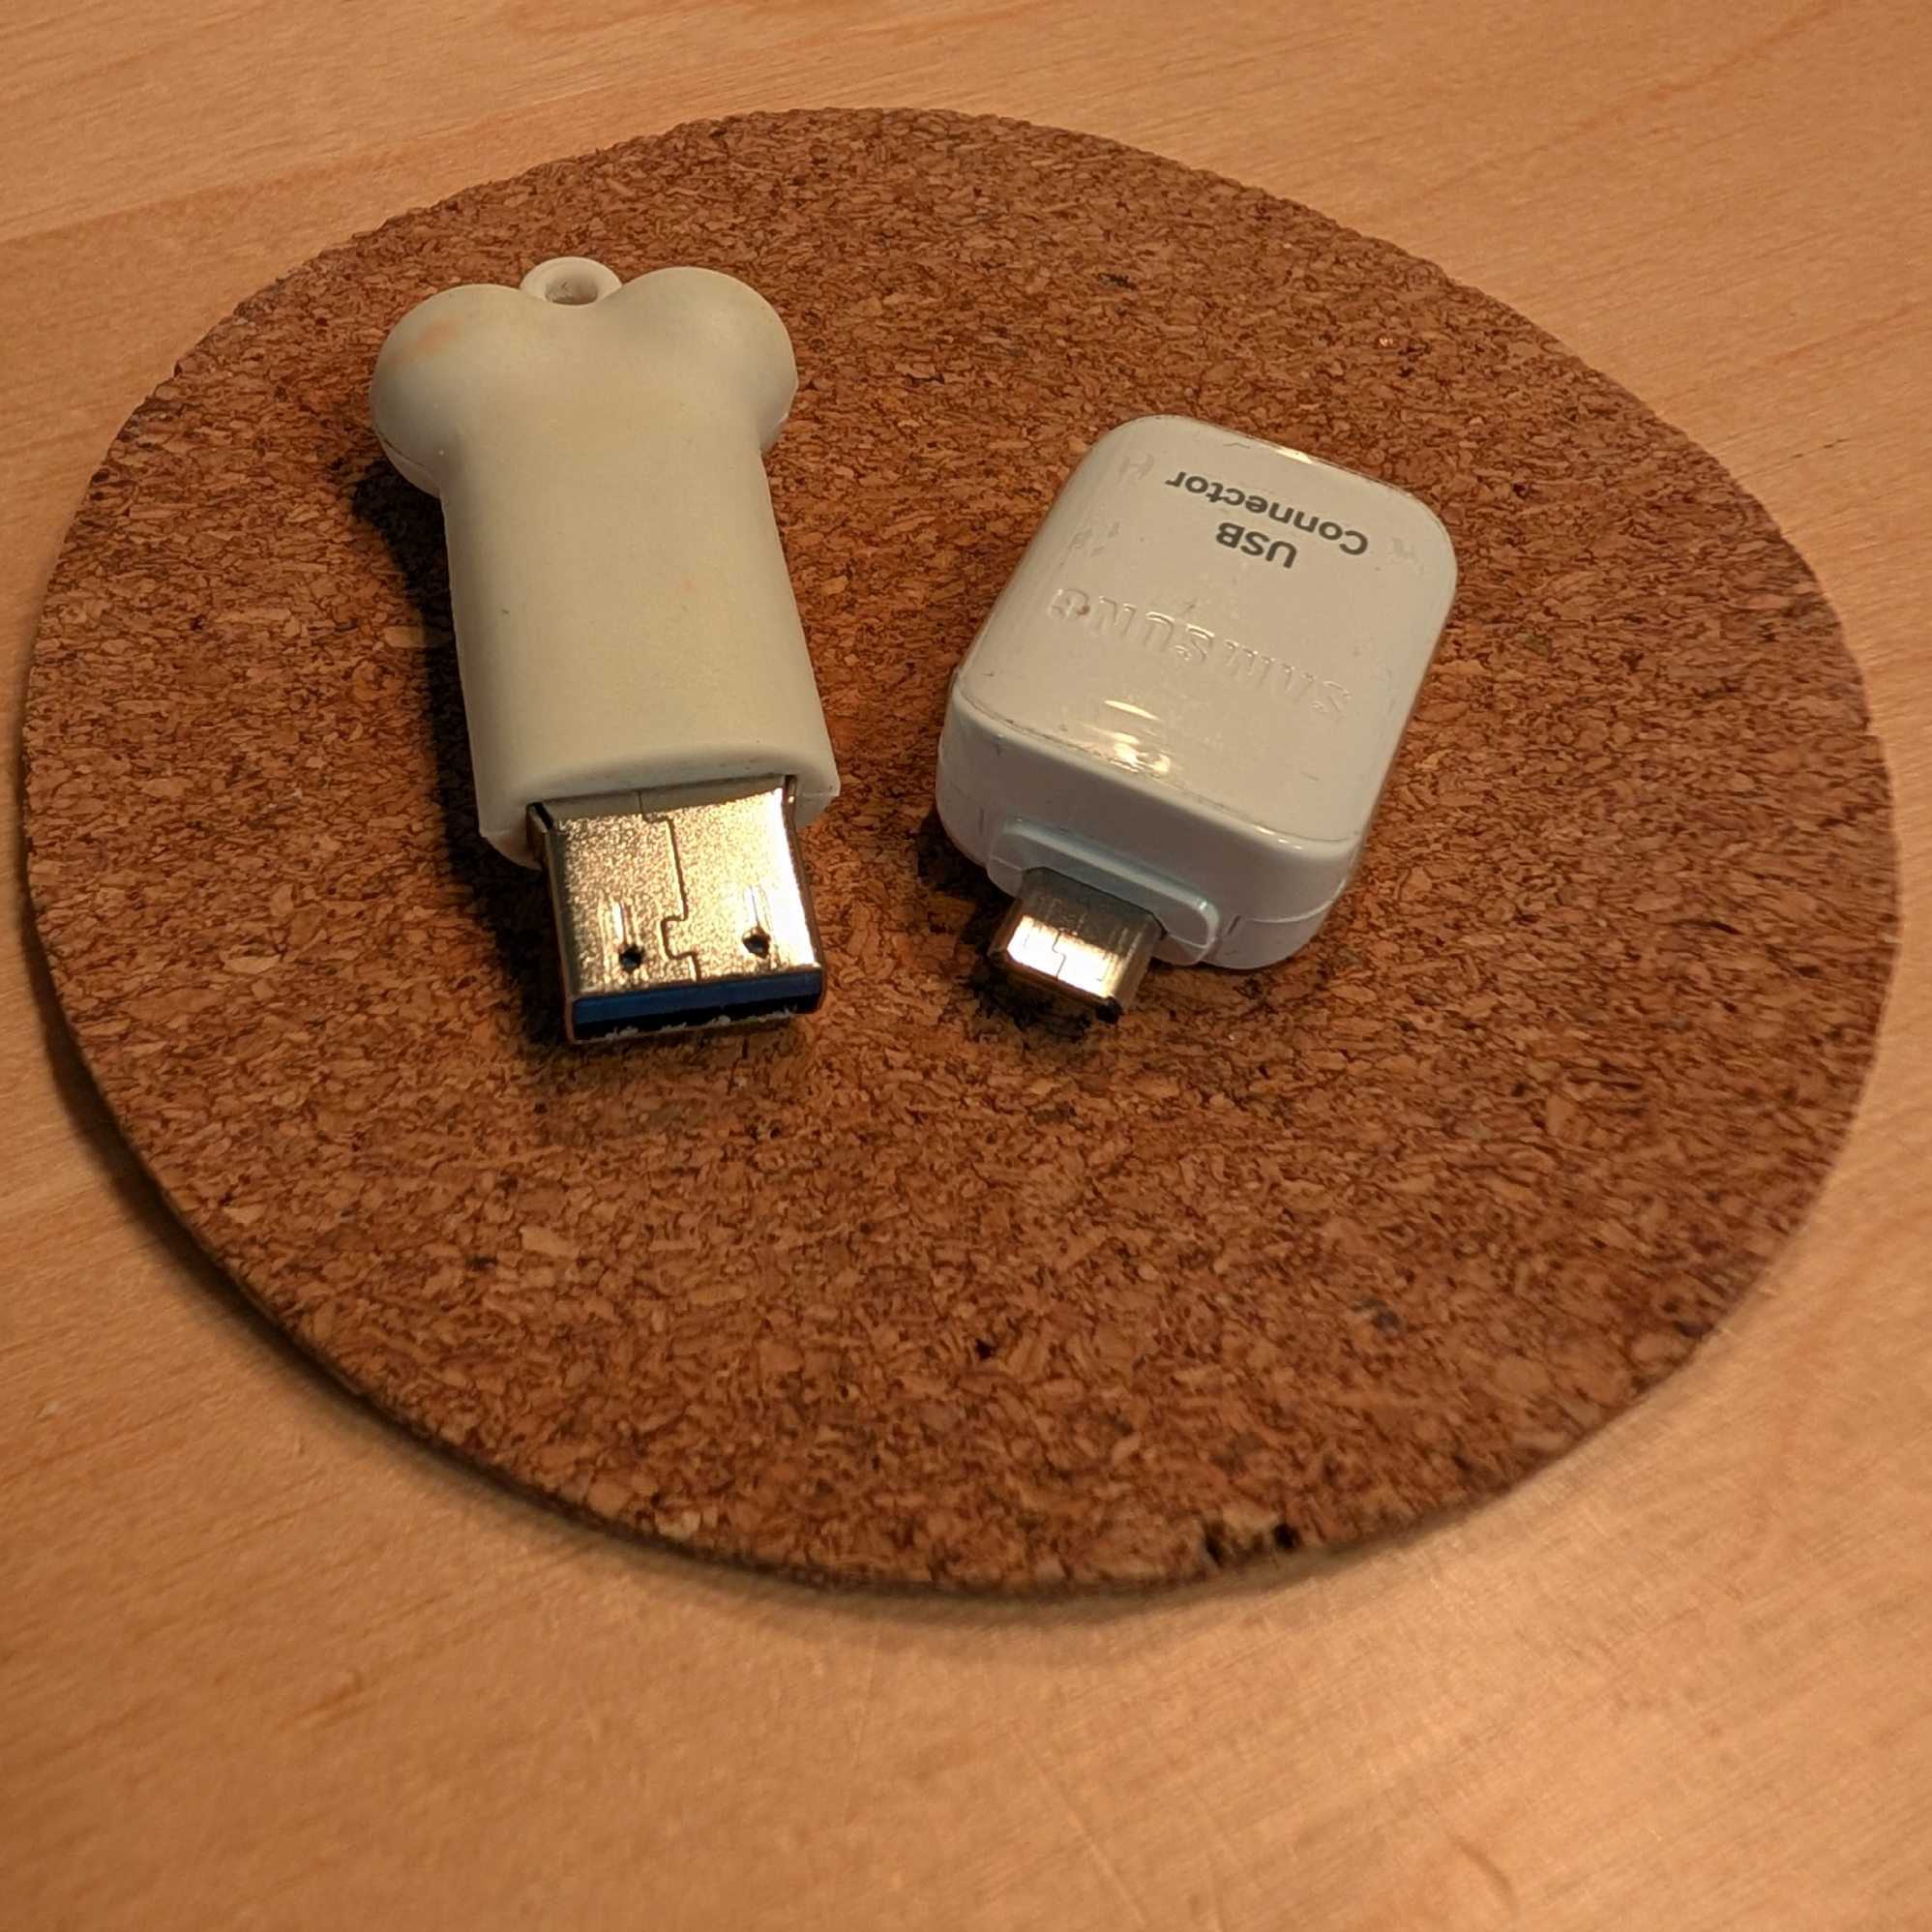
For the SoundTouch 10, you need an adapter. For me an OTG adapter for micro-USB, that I got some years ago together with my smartphone, worked.
Connect via telnet
After the USB-Stick is plugged in, use your computer to open the shell.
telnet 192.168.178.2
Replace 192.168.178.2 with the IP address of your speaker.
You should see something like that
... --- ..- -. -.. - --- ..- -.-. ....

        ____  ____  _____ _________
       / __ )/ __ \/ ___// _______/
      / __  / / / /\__ \/ __/
 ____/ /_/ / /_/ /___/ / /___
/_________/\____//____/_____/


spotty login: root
Type root as username.
No password is required. 😅
Alternative
If telnet 192.168.178.2 does not work, try to connect via
ssh -o KexAlgorithms=+diffie-hellman-group1-sha1 -o HostKeyAlgorithms=+ssh-rsa root@192.168.178.2
or via
stty raw -echo; nc -t 192.168.178.22 23; stty sane
Change the config on the speaker
Automated setup
Once you are connected to the speaker shell, run:
curl -fsS http://ueberboese.your-example-host.org:8080/mgmt/init/set-up-this-speaker.sh | sh
Replace ueberboese.your-example-host.org:8080 with the hostname (and port, if needed) of your Überböse API server.
The script will:
- Back up any existing
OverrideSdkPrivateCfg.xml - Write a fresh config with all URLs pointing to your server
- Print a reminder to reboot
No manual substitution is needed — the correct server URL is embedded automatically.
Manual setup
Instead of using curl -fsS http://ueberboese.your-example-host.org:8080/mgmt/init/set-up-this-speaker.sh | sh you can also do the set-up manually:
We only have to change two lines in one file on the device.
cd /var/lib/Bose/PersistenceDataRoot
cat OverrideSdkPrivateCfg.xml
This should show
<SoundTouchSdkPrivateCfg>
    <margeServerUrl>http://ueberboese.your-example-host.org:8080</margeServerUrl>
    <statsServerUrl>https://events.api.bosecm.com</statsServerUrl>
    <swUpdateUrl>http://ueberboese-downloads.your-example-host.org:8080/updates/soundtouch</swUpdateUrl>
    <isZeroconfEnabled>true</isZeroconfEnabled>
    <usePandoraProductionServer>true</usePandoraProductionServer>
    <saveMargeCustomerReport>false</saveMargeCustomerReport>
    <bmxRegistryUrl>https://content.api.bose.io/bmx/registry/v1/services</bmxRegistryUrl>
</SoundTouchSdkPrivateCfg>
We need to change it to
<SoundTouchSdkPrivateCfg>
    <margeServerUrl>http://ueberboese.your-example-host.org:8080</margeServerUrl>
    <statsServerUrl>http://ueberboese.your-example-host.org:8080</statsServerUrl>
    <swUpdateUrl>http://ueberboese-downloads.your-example-host.org:8080/updates/soundtouch</swUpdateUrl>
    <isZeroconfEnabled>true</isZeroconfEnabled>
    <usePandoraProductionServer>true</usePandoraProductionServer>
    <saveMargeCustomerReport>false</saveMargeCustomerReport>
    <bmxRegistryUrl>http://ueberboese.your-example-host.org:8080/bmx/registry/v1/services</bmxRegistryUrl>
</SoundTouchSdkPrivateCfg>
You can do that via
HOST=$(grep -o '<margeServerUrl>[^<]*' OverrideSdkPrivateCfg.xml | sed 's|<margeServerUrl>||') && \
sed -i \
  -e "s|<statsServerUrl>.*</statsServerUrl>|<statsServerUrl>$HOST</statsServerUrl>|" \
  -e "s|<bmxRegistryUrl>.*</bmxRegistryUrl>|<bmxRegistryUrl>$HOST/bmx/registry/v1/services</bmxRegistryUrl>|" \
  OverrideSdkPrivateCfg.xml
Or you can use vi for that. (If you know vi)
vi OverrideSdkPrivateCfg.xml
And then restart the speaker via
reboot
Manual advanced setup without envswitch
If you did not follow the guide step by step and did not execute envswitch boseurls set <...>
before you reached here, that is totally fine.
When you do the advanced set-up, the envswitch is not needed at all.
But that changes things a little bit.
- The file
/var/lib/Bose/PersistenceDataRoot/OverrideSdkPrivateCfg.xmlwas not created. You have to edit the file/opt/Bose/etc/SoundTouchSdkPrivateCfg.xml - Of course the content of that file was not changed to use the url of you Überböse API server,
So
cating will print something like ```xml <?xml version=”1.0” encoding=”utf-8”?>
```